1 cup hazelnuts
1 cup walnuts
1 Tablespoon gluten free unsweetened cocoa powder
1/2 teaspoon cinnamon
1/8 teaspoon cloves
a pinch of salt
1/3 cup gluten free flour mix
1/3 cup honey
1 egg white
Grind the nuts finely in a blender of food processor. Mix with the rest of the ingredients and form a sticky ball of dough.
Roll out the dough on a piece of waxed paper covered in a virtual snowfall of powdered sugar. Roll the dough until it is 3/8 inch thick, and make sure to keep a deep coating of powdered sugar so the dough doesn't stick to the rolling pin or the counter etc.
Cut the dough in to 1 x 1 1/2" bars. Transfer them to a well-greased cookie sheet. Bake at 275 degrees, about 25-30 minutes or until they appear dry. Transfer to drying racks and cool completely. Place the cooled cookies on waxed paper and drizzle them with icing.
Icing:
Mix 1 Tablespoon of egg white, 1/2 cup powdered sugar, and 1-2 Tablespoons of gluten free orange liqueur to make a thick but drizzly icing. Not too thin. Add more liqueur or more sugar as needed to achieve the right consistency. Drizzle attractively on the cookies. Allow to dry completely before storing the cookies in an airtight container with waxed paper between the layers of cookies.
Note: Make sure the nuts are fresh, as the freshness of the nuts makes the flavor of these cookies. Rancid nuts are not good.
Make sure all of your ingredients, including spices, are gluten free!
© Gf-Zing! | Alice DeLuca
Gf-Zing! Celebrating flavor in the gluten-free world...
November 30, 2005
November 20, 2005
Peanut Butter Rice treats - crispy style
Gf-Zing! has developed and tested this recipe for krispy-style treats, gluten free and made with peanut butter for extra flavor.
3 cups crispy gluten free rice cereal
1 cup shredded coconut
1/3 cup light corn syrup (or part corn syrup, part honey)
1/2 cup brown sugar
3/4 cup gluten free peanut butter
1 teaspoon gluten free vanilla
Mix the rice cereal and coconut in a large bowl.
Mix the rest of the ingredients in a large, heavy pot. Bring just to a boil while stirring.
Remove the pot from the heat. Stir the hot mixture into the cereal and coconut. Dump this mixture into a greased 9x13 inch pan and spread out, using greased hands or a piece of wax paper so it won't stick to your hands. Cool completely and then cut into bars.
Alternatively, when the mixture has cooled enough to touch, form it into balls or make little bird nests and fill each one with 3 gluten free jelly beans. Cool completely.
Make sure all your ingredients are gluten free.
© Gf-Zing! | Alice DeLuca
Chocolate Pudding - dairy free also
This recipe has been developed and tested for the gluten free community by Gf-Zing!
2 1/4 cups chocolate almond milk or gf rice milk
1/2 cup sugar
2 Tablespoons cornstarch
2/3 cups unsweetened gluten free cocoa or 3 ounces of unsweetened gluten free chocolate
1 large egg
1 teaspoon gluten free vanilla extract
1/4 teaspoon salt
Pour 2 cups of the almond or rice milk, 1/4 cup of sugar and the 1/4 teaspoon of salt into a large heavy pot. Bring to a boil and remove this from the heat. If using the unsweetened chocolate squares, break them up and add them to the hot milk mixture, to melt. If you are using the powdered cocoa, and want a more intense chocolate flavor, add 1 ounce of unsweetened chocolate here.
In a bowl, mix the remaining 1/4 cup sugar, the cornstarch and the cocoa. Whisk the remaining 1/4 cup of almond or rice milk into this mixture to make a smooth soupy substance. Whisk the mixture into the hot milk mixture and bring the combination back to a boil, whisking constantly so that lumps are not formed! Cook this for 2 minutes, stirring constantly, then remove from the heat.
In the same bowl where you mixed the cornstarch and cocoa up, whisk the egg until well beaten. Whisking constantly, add a ladle full of the hot mixture. Then pour the egg mixture into the hot mixture, whisking constantly. Cook the entire mixture over low heat, whisking constantly for 1 to 2 minutes, until it thickens. Do not boil. (If you are not confident about cooking homemade custard, you can do this part in a double-boiler, which will ensure that the mixture does not boil.) Add the vanilla last. Pour the pudding into a serving dish and chill. If you do not want a skin to form on the top of the pudding, place a piece of wax paper on the top and press it down to touch the surface of the pudding while it chills. Serve cold.
Kids like this pudding served with honey, believe it or not.
Use all gluten free ingredients!
© Gf-Zing! | Alice DeLuca
November 15, 2005
Pumpkin Pie - dairy and gluten free
This recipe has been developed and tested for the gluten free community by Gf-Zing!
A one-crust unbaked gluten free pie shell (9-inch deep-dish glass pie plate is perfect)
Filling:
1 can pure pumpkin (1 pound size - the "one-pie" size)
4 large eggs
2/3 cup sugar
1/2 teaspoon salt
1 1/2 teaspoons cinnamon
1/2 teaspoon ground ginger
1/2 teaspoon freshly grated nutmeg
1/4 teaspoon allspice
1/4 teaspoon ground cloves
1 1/2 cups almond milk
For a standard pumpkin pie, made with evaporated milk or heavy cream, the recipe would use fewer eggs. For this pie, which uses almond milk instead, more eggs are required to set the filling. This pie also includes less sugar than standard recipes.
Mix all the ingredients for the pie filling together with a whisk, electric mixer or food processor until thorouhly mixed. You can mix the pie filling in the same food processor that you mixed the pie crust in, and any left-over crust ingredients will just get mixed in to the filling with no ill effects on the pie.
Anyway, after the filling is thoroughly mixed, pour it in to the unbaked pie shell set in a glass pie plate. The filling will be quite thick and there will be enough for a deep dish pie. Bake in a preheated 425 degree oven for 10 minutes, then reduce the heat to 350 and bake for another 35 minutes or more, until the filling is set. If the pie is 9-inches and deep dish, it may take as much as an additional 20 minutes before the filling is set. To test the pie, dip a clean, dry, knife-blade in to the center of the pie. The knife should come out nearly clean, but little bits of filling clinging to the knife are ok. The top of the pie will start to crack.
Remove the pie from the oven. Cool completely. Pumpkin pie is an egg-based custard pie, so it should be kept chilled when not being served, and then brought to serving temperature.
If you prefer, you can use a one-pie can of squash, or 1 1/2 cups of home-cooked, mashed, drained pumpkin or winter squash (butternut, buttercup etc.). To use winter squash or sugar pumpkin, halve them and seed them, then bake or microwave until tender. Finally, remove it from the skin, allow it to sit overnight, then strain it thoroughly to remove excess liquid.
If you don't care about using dairy but want to use less fat, you can substitute 1 2/3 cups of 1% skim milk or gluten-free fat-free evaporated milk for the almond milk, and use 2 eggs plus 1/2 cup of gluten-free eggbeaters product for the eggs. Make sure the product is gluten free.
Make sure all the ingredients, including the spices, are guaranteed gluten free by the manufacturer. Certain manufacturers guarantee the gluten-free quality and accurate labeling of their spices. Read the internet gluten-free lists to find out which manufacturers are currently maintaining this level of quality.
The original concept of this recipe is from the Victory Garden Cookbook by Morash. There, the recipe was a an old-fashioned winter squash pie, and called for milk or cream.
© Gf-Zing! | Alice DeLuca
November 14, 2005
Baked Beans with Rum
It is a common question - which brands of baked beans are gluten free? Which ones don't contain meat? Well, if you make your own, the beans will taste better, and you will know for sure what's in them!
2 Tablespoons oil
1/2-3/4 cup diced onion
2 cloves garlic, minced
2 cans (15.5 ounces each) gluten free Navy Beans
1/2 cup gluten free ketchup
1/2 cup rum (we used light rum)
1/2 cup dark brown sugar
1/3 cup molasses
2 Tablespoons gluten free Worcestershire sauce
1/2 teaspoon ground allspice
1/4 teaspoon freshly ground black pepper
1/4 teaspoon salt
Fry the onion and garlic in the oil until soft. Mix the fried mixture with all the other ingredients in a large bowl - the mixture will be thin and soupy - that's ok. Transfer the mixture to a baking dish (Corningware casseroles are perfect for this). Do not put a cover on the dish. Bake at 350 for one hour, stirring from time to time. Then turn the heat up to 400 and bake until the sauce has reduced and thickened to the consistency you prefer. Stir frequently during this part of the cooking (every ten minutes) as the sauce can go from thick to stuck-to-the-bottom-of-the-pan in very short order!
These beans are just delicious, and they smell great when they are cooking.
This is adapted by Gf-Zing! from a recipe from Lean Bean Cuisine, by Jay Solomon, 1995.
Make sure all your ingredients are gluten free.
© Gf-Zing! | Alice DeLuca
November 13, 2005
Crab Cakes with Coconut
These appetizer sized crab cakes are delicious and rich! People consume quite a lot of them. That's why the recipe uses 2 pounds of crab meat. This recipe has been adapted for the gluten free community by Gf-Zing!
2 pounds fresh or canned gluten free crab meat (drained in a strainer) - about 1 quart
1 pound frozen grated fresh coconut (Asian grocery stores carry this product) - one package
7-8 cloves garlic, finely grated
3 Tablespoons gluten free Fish Sauce (check the label for wheat)
3 Tablespoons gluten free Oyster Sauce (choy sum)
4 eggs
freshly ground black pepper
cornstarch if necessary
Glutino brand corn and rice bread, made in to crumbs (for rolling the cakes in before frying)
Mix the crab meat, coconut meat, garlic, sauces and pepper, and eggs together. Do not break up the crab too much - leave some whole chunks in there. Make a mixture that can be formed in to small cakes. If the mixture is too wet, add up to 2 Tablespoons of cornstarch and some of the bread crumbs, until the mixture will form cakes.
Make bite-sized cakes from the mixture, - about 1 - 1 1/2 inches across, and roll them in the breadcrumbs and place them on waxed paper, ready for frying.
Heat some frying oil in a large pan until quite hot - 400 degrees, or prepare a deep-fryer. Be careful not to burn yourself! If you are making this dish for gluten-free guests, and you have used your deep-fryer oil for frying something else, change the oil before preparing this dish for your gluten-free guests. Don't be shy about telling them that you used new oil - they will appreciate your care and concern!
Fry the cakes a few at a time until they are golden. Drain the cakes on paper towels to absorb excess frying oil.
Notes: Be careful to read the label on Thai or Vienamese Fish Sauce - some brands contain wheat. For oyster sauce, check the internet lists or your local store for the brands that assert that they are gluten-free.
Serve these cakes with Thai Sweet Chili Sauce (gluten free).
Make sure that all your ingredients are gluten-free!
© Gf-Zing! | Alice DeLuca
November 12, 2005
Spice Rub for Turkey
1 teaspoon dried thyme
1 teaspoon dried marjoram
1 teaspoon paprika
1 teaspoon gluten free prepared mustard
salt
freshly ground pepper
For every 7-8 pounds of bird, mix up the above amount of herb mixture. Rub this mixture on the bird, and roast as usual. The herbs will season the drippings in the pan, and make for a more interesting gravy.
The paprika contributes to the attractive coloration of the roast. You can use this mixture for chicken and cornish game hens also.
The mixture comes from a recipe by one of our favorite cookbook authors, Perla Meyers. The original recipe, which includes a butternut squash and lingonberry sauce, is called Roast Turkey in Lingonberry Sauce, and can be found in the From Market to Kitchen Cookbook, 1979.
Make sure all your ingredients, including herbs and spices, are gluten free!
© Gf-Zing! | Alice DeLuca
November 11, 2005
Sweet Potatoes with Pineapple and Cinnamon
4 sweet potatoes or red garnet yams, cleaned and baked until soft
Gluten free crushed pineapple, drained
brown sugar to taste
salt
pepper
cinnamon to sprinkle on top
The amount of pineapple should be 1/2 the volume of cooked yams, approximately.
Peel and mash the sweet potatoes (if you can obtain canned sweet potatoes that do not have gluten, you can use them, but why not use fresh?) Add the crushed pineapple and as much brown sugar as you feel is appropriate. Add a little salt and pepper.
Place the mixture in a buttered or greased casserole, sprinkle gently with cinnamon.
Bake at 350 until heated through - if you use 4 yams, you would need to heat this casserole for 30-45 minutes, depending on the depth of the mixture in the dish.
Make sure that your spices are gluten free!
© Gf-Zing! | Alice DeLuca
The Gravy Problem
The annual holiday dilemma is - how do you make a gluten free gravy that is not reminiscent of glue, or perhaps paste?
There are several methods that work well, and Gf-Zing! has tested several options for the gluten free community.
First, let's talk about the gourmet version. Here, you add a reduction or a 'gastrique' to the stock, and thicken the gravy with arrowroot. It is more of a sauce than a gravy, but will be delicious. You may want to increase the quantities to produce more gravy!
Degrease the pan juices from the roast bird. To the remaining juices, add 2 cups of hard cider (or 1/2 cup white wine) and reduce by heating - reduce it down to just 1/4 cup or a few tablespoons. Add 1 1/2 cups of stock, and reduce this mixture down by one third.
Mix 1 Tablespoon of arrowroot or cornstarch with a little stock and add it to this remaining sauce gradually, stirring constantly. Heat until thickened. Add salt and pepper as needed, and strain the sauce before serving. You may add currant jelly, as well, a few tablespoons, and a few tablespoons of fresh butter, to enrich the sauce.
You can make a similar sauce using a french 'gastrique." For this, you cook 1/4 cup of white sugar with 1/4 cup of red wine vinegar in a 2-quart saucepan until it caramelizes into a brown syrup - this will be thick, and you don't want it to burn so watch carefully. Next, add 1 1/2 cups of rich stock and a little wine if you like, while being careful not to be burned by spattering syrup! The caramelized vinegar and sugar is the gastrique that will make your gravy taste really good. Thicken as before, adding a mixture of 1 Tablespoon arrowroot mixed with enough water to make a soupy mixture, and cook until thickened. Refresh this gravy with a little butter, and add some salt and pepper as needed.
For a more standard gravy, use a gravy flour mix as follows:
2 Tablespoons brown rice flour
3/4 Tablespoon sweet rice flour (mochiko)
1 1/2 teaspoons tapioca starch
1/3 teaspoon of xantham gum
Mix these ingredients together thoroughly, and then use it in place of flour in your regular gravy recipe.
Make sure all your ingredients are gluten free!
© Gf-Zing! | Alice DeLuca
Sweet Potatoes with Apricots
4 sweet potatoes or red garnet yams, cleaned, baked and peeled
1 Tablespoon gluten free frozen orange juice concentrate
1 Tablespoon dark brown sugar
salt
freshly ground pepper
1 egg
a very small amount of freshly grated nutmeg
1/2 cup dried apricots, diced and soaked in warm water for 1 hour and drained (discard the soaking liquid and keep the apricots)
Mash the sweet potatoes or yams. Add the rest of the ingredients.
Transfer the mixture to a buttered or greased casserole, (a shallow one is best so the mixture is not too thick and will heat quickly.) Bake for 25 minutes at 350, until slightly browned on top.
You can substitute other dried fruits for the apricots - cranberries, raisin, pears etc. or a combination.
This is based on a recipe in Casserole Cookery Complete, a cookbook from the mid and late-1950s.
Make sure all your ingredients are gluten free!
© Gf-Zing! | Alice DeLuca
November 10, 2005
Gluten Free or GF Pie Crust
We tried mixes, and recipes, and had almost given up on ever having a decent pie again, when we discovered this method for making gluten free pie crust. Let's just mention that pie was one of the most important foods in our repertoire, and we used to be very proud of our pie crust, and then we entered the parallel universe of gluten free cooking, for medical reasons. We went in to pie withdrawal - depression, cold shakes, somber mood.....after all, what were we going to have for breakfast, if we couldn't eat left-over pie?
Well, the news is good - you can have your pie and eat it too!
Use the Dream Pastry Recipe from Bette Hagman’s More From the Gluten-Free Gourmet. A very similar recipe is also called "Donna Jo's pie crust" and is available on the internet. (Be careful about the recipes on the internet, which are sometimes missing key ingredients in the list of flours, such as the sweet rice flour, for example!) Of course, we don't exactly follow the recipe anyway, so we have printed here the method we are using at the moment.....
We prefer the flavor of lemon juice to the flavor of vinegar, so we use fresh lemon juice in the recipe. Also, we use one stick of gluten free margarine and one of butter (we don't like Crisco so much). Lastly, we sprinkle the top of a two crust fruit pie liberally with sugar.
To save time and aggravation when hand-mixing the pie dough, we use a large cheese grater to grate the butter into the dry ingredients. This makes it much easier to get the "lima bean" sized pieces of butter called for in the recipe. We have also used a Braun food processor to make this crust, and it was acceptable, you just have to be careful not to overmix the butter.
Here are the ingredients for one two-crust pie shell:
Dry ingredients:
1/2 cup tapioca flour (tapioca starch)
1/2 cup cornstarch
1/4 cup potato starch (katakuriko in Japanese stores - this is NOT the same as potato flour)
1 cup sweet rice flour (mochiko flour - not the same as white rice flour)
1 teaspoon xanthan gum
1/2 tsp salt
1/2 teaspoon sugar
Shortening:
1/2 cup gluten free margarine
1/2 cup butter
Liquid ingredients:
1 egg
1 Tablespoon fresh lemon juice
1 Tablespoon ice water
wax paper
sweet rice flour to sprinkle on the wax paper
lots of sugar for sprinkling on the top of the pie
Put the dry ingredients in a bowl and mix them thoroughly with a fork. If you own a sifter, you could sift them together, but it is not necessary. Grate in the butter and margarine using a large cheese grater. Mix the dry ingredients and the shortenings up with a fork until the pieces of butter are distributed evenly - you don't need to get the pieces of butter as small as they would be in a wheat crust. The size of "lima beans" may be a little large, but don't go smaller than kidney beans! Anyway, mix up the liquid ingredients until well combined, then pour them in to the dry ingredients and mix together. Squish the dough into a ball and wrap it up to store in the refrigerator for one hour. (For the record, we have made this crust in the winter and gone straight to rolling it out, without refrigerating it. You wouldn't do this when the air is warm in the summer, but it is ok to do this in the winter when it is cold.)
Divide the dough in half.
To roll out this crust, spread out a piece of wax paper, dust it with sweet rice flour or GF flour mix, or whatever comes handy, put one piece of the dough on top, sprinkle with more flour, spread another piece of wax paper on top of the dough, and roll out with a rolling pin. * The dough is now contained between two sheets of wax paper. Peel off the top piece of wax paper, flip the crust on top of the pie plate, adjust it to fit the dish and remove the other piece of wax paper. Your counter is clean, and your pie crust did not fall to pieces when you tried to put it in the pie dish! You rock!
Fill your pie, then repeat the pie crust rolling maneuver for the top crust. Cut pretty holes in the top crust before transfering it to the pie, if you wish. After putting the top crust on the pie, sprinkle the top crust liberally with sugar - maybe 2 - 4 Tablespoons! Cut steam vent holes in the crust, if you forgot to do it before, and then bake the pie. This crust gets nice and brown and crispy, and it has a delicious buttery flavor! You bake it as you would any other pie crust (about 50 minutes at 400 degrees, for a two-crust fruit pie.)
*Note about the rolling pin: We use a piece of dowel from the hardware store - makes a perfect rolling pin, and costs very little. The piece we purchased was being sold as "closet pole" and is 1" in diameter and 18 inches long.
Make sure to use all gluten free ingredients!
© Gf-Zing! | Alice DeLuca
November 9, 2005
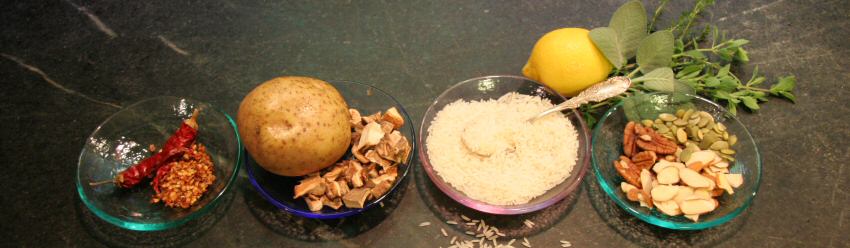
Wild Rice in the Zojirushi Neuro-Fuzzy Rice Cooker
All the websites say it is possible, even the Zojirushi website, but none of them tell you how! Well, here's how you cook wild rice in the Zojirushi.
1 unit rice
rinsing water
additional 3 units of water
Allow a good 2 hours before dinner.
Rinse the rice by putting it in a bowl, filling the bowl with water, giving the rice a stir and then pouring off the excess water. Do this a couple of times.
Place the washed rice and 3 units of water in the Zojirushi, and use the menu setting button to change the setting to "brown rice."
This rice will take a long time to cook, and should be allowed to sit in the cooker for quite a while before serving, to dry out some more. Using the extra water (3 to 1 ratio as listed) will make sure that the rice is fully cooked. Wild rice is not actually a rice, and it has a tendency to be served at an inappropriately crunchy stage - when fully cooked, the grains should have split open completely, and the insides will be an interesting translucent gray-white color. There will be a pleasant chewy quality to the brown part of the grain, but you won't need to make a trip to the dentist after eating!
© Gf-Zing! | Alice DeLuca
November 7, 2005
Chipotles in Adobo - homemade and gluten free
Many modern American recipes call for Chipotle Chiles in Adobo sauce - a tablespoon or two. Some of the best fusion cooking recipes include this flavoring. Unfortunately for the gluten free community, the canned chipotles readily available in supermarkets often contain wheat flour (weirdly, because there is no wheat flour in original Mexican recipes for this sauce.) Gf-Zing! has developed this good, gluten free recipe for this smoky, extremely spicy sauce, based on a number of recipes including some translated from Mexican websites.
The recipe presented here is a combination of the "best of" recipes for quick-cooking chipotles in adobo (adobados) from around the web. The original recipes can be time-consuming, calling for soaking the chilies in vinegar for four days, reducing large quantities of vinegar by boiling, or they may give instructions for a half pound of chiles! The following recipe will make a modest amount of sauce, enough for a small family. Store it in small containers in the freezer - we use 8 little take-out containers and put a couple of tablespoons of the sauce in each one.
1 ounce dried chipotles (this could be 8-12 peppers)
1/3 cup onion, chopped
5 Tablespoons gluten free cider vinegar
2 cloves garlic, sliced
4 Tablespoons gluten free ketchup
2 Tablespoons chopped roasted green chilies (canned)
1/8 teaspoon ground cumin
1/4 teaspoon dried oregano
1/4 teaspoon salt
1 peppercorn
3 cups water
Soak the chiles in boiling water to cover for one hour, to soften them up. Using the point of a small, sharp knife, make a slit in the side of each chipotle chili and remove the seeds and the hard stem end out of the chili. Be very careful, as you trim the chili peppers, not touch your face with your hands - these chilies are very spicy and the chemicals that cause the spice of the peppers (capsaicinoids) can burn mucous membranes. You may notice that breathing the vapors from the chilies may make you cough as well - so use good ventilation.
Put the chilies and all the other ingredients in a 2 quart saucepan and bring to a boil. Cover, reduce the heat to a simmer, and cook for 1 or 1 1/2 hours until the chilies are soft like overcooked peas. Keep an eye on things so the sauce doesn't boil down too much. The total quantity of sauce, at the end, will be 2 cups. Put all of the sauce and chiles in the blender and puree completely. You may want to add another 1/4 teaspoon of salt and a pinch of sugar to adjust the flavors.
Store in small containers in the freezer.
If you take an interest in the huge variety of Mexican sauces, and you can read Spanish, try this website.
Make sure that all the ingredients, including spices, are gluten free! © Gf-Zing! | Alice DeLuca
November 6, 2005
Chicken Salad with Lemon Mayonnaise
1 cooked chicken, removed from the bones and cut or torn into large chunks
1/2 cup gluten free mayonnaise
juice of 1/2 lemon
salt
freshly ground pepper
1/4 cup minced parsley
1/4 cup minced scallions or red onion
1 stalk of celery, chopped
Fold all the ingredients together in a bowl. Refrigerate until ready to serve. Adjust the seasonings, and add a very small pinch of sugar if you like.
If you prefer less onion, or don't like bits of onion in your chicken salad, grate a little onion and let a few teaspoons of the juice go into the mixture.
Be sure to use gluten free mayonnaise - check the gluten free food lists on the internet or at your grocery store.
© Gf-Zing! | Alice DeLuca
Chicken Soup with Salsa and Lime
Soup:
1 quart gluten free chicken stock
1 1/2 cups gluten free salsa
1/4 cup fresh lime juice (2-3 limes)
Add-ins:
2 cups shredded, cooked chicken
1 cup fresh or frozen corn kernels
1 cup cooked rice
1/4 cup chopped cilantro
Bring the soup ingredients to a boil. Add the "add-ins" and cook for 3-5 minutes. Season to taste with salt and freshly ground pepper.
Serve with avocado slices, gluten free sour cream (omit for dairy free), lime wedges and gluten free tortilla chips.
If using a pre-cooked chicken, make sure it did not include "an added solution" or a self-basting feature, as these added fluids can contain gluten.
Make sure all your ingredients are gluten free.
© Gf-Zing! | Alice DeLuca
Herbed Hot Broth
A nice bowl of highly flavored, steaming broth complements cold winter afternoons beautifully.
2 quarts gluten free chicken or beef broth
1/2 to 1 cup red wine (Chianti)
4 fresh tomatoes, halved
4 4" sprigs fresh rosemary
4 4" sprigs fresh thyme
4 large leaves of fresh sage
1 1/2 teaspoons ground cumin
3 bay leaves
10 peppercorns
3" cinnamon stick
3 whole cloves
salt to taste
2 teaspoons of sugar, or to taste
Combine all the ingredients except the salt and sugar and simmer gently for 45 minutes. Remove all the herbs and pieces of tomato with a stainless mesh screen strainer (this strains out fine particles). Save the broth! Throw out the herbs and tomato bits. Season the broth with salt, sugar and freshly ground pepper. This is an old-fashioned bouillon, so it should be clear.
Serve hot!
© Gf-Zing! | Alice DeLuca
Pineapple Fried Rice
You can use almost any proportion of these ingredients, and throw in other things besides.....
3 cups cooked, cold jasmine or other long-grain rice, massaged to separate the grains of rice
1 large pineapple (peeled, cored and cut in chunks), or a can of gluten free pineapple chunks, drained
2 Tablespoons vegetable oil
1/4 cup peeled, sliced shallots
10 cloves garlic, chopped
1/2 pound shrimp, shelled and cleaned (optional)
1 1/2 teaspoons gluten free curry powder
1 red or green bell pepper, chopped
3 scallions, sliced
1 1/2 Tablespoons sugar
1 1/2 Tablespoons gluten free Thai Fish Sauce
Note: Read the label on the fish sauce. Some fish sauce companies include wheat, for unknown reasons, in fish sauce. Purchase a fish sauce that does not include wheat.
Prepare all your ingredients ahead of time, and get out the wok.
Heat the wok, and add the oil by drizzling it down the sides. When the oil is hot, add the shallots. Stir-fry the shallots until they are golden, a couple of minutes. Add the garlic and stir-fry briefly until it smells good. Add the shrimp and stir-fry until the shrimp are just turning pink - they don't have to be finished cooking. Add the curry powder and stir-fry for 30 seconds. Add the pineapple, bell pepper and scallions and stir-fry until the pineapple is heated through, about 2-3 minutes. Add the cold rice and stir-fry until the rice is hot. Add the sugar and stir-fry for 30 seconds. Lastly, add the fish sauce by drizzling it down the sides of the wok into the rice. That's it!
For gluten free curry powder, we make our own, using the recipe in Rebecca Reilly's Gluten Free Baking.
You can add grated ginger, and chopped jalapeno peppers, or gluten free chili paste to this dish if you like things a bit spicier.
Make sure that all your ingredients are gluten free!
© Gf-Zing! | Alice DeLuca
November 5, 2005
Jelly Roll - a cake
Jelly Roll is very popular with children, and adults who used to be children. It's a little tricky to make, because if you overcook the cake it will not roll up!
3/8 cup cornstarch
3/8 cup GF cookie flour mix
1/4 teaspoon powdered gluten free vanilla
1/2 teaspoon gluten free baking powder
pinch of salt
3 eggs
1 cup sugar
1 Tablespoon water
1/2 cup seedless raspberry jam, melted
waxed paper
Preheat the oven to 400 degrees. Grease a 13x9 inch baking pan (the kind you use for brownies).
Sift together the cornstarch, GF flour, GF vanilla powder, baking powder and salt.
In a large bowl, whisk or beat the 3 eggs and half of the sugar until the mixture is very thick, and light in color - it should be thick and form ribbons off the beater or whisk. Gently fold in the dry ingredients, and then stir in the tablespoon of water. Pour the batter into the greased pan and smooth it out gently to fill the pan. Bake for 10 minutes - not any longer. The cake will spring back when touched briefly with your finger (don't burn yourself.)
Spread out a sheet of waxed paper on the counter, and sprinkle it with the remaining 1/2 cup of sugar. Now comes the critical part. Switch into emergency cooking mode: Turn the cake out on to this sugar coated waxed paper immediately after you take it from the oven. Don't answer the phone. Tell the kids they have to wait. Now, trim off the edges of the cake with a sharp knife. Spread the cake with the jam. Roll the cake up firmly, starting at the short end of the cake. Allow the cake to cool and slice it in 8 or more pieces.
This cake is great with a cup of first-quality Darjeeling tea. Serve the cake on a nice china plate, and enjoy a moment of peace, and the civility and pleasures of bygone days.
© Gf-Zing! | Alice DeLuca
Meatballs in Red Wine Sauce
Meatball mixture:
1 cup of GF bread crumbs (make your old GF bread into crumbs and store it in ziplock bags in the freezer)
1 1/2 or 2 pounds ground beef (we grind steak to make ground beef), or ground turkey
2 eggs
1 medium onion finely chopped
1/2 cup chopped Italian parsley (about half a bunch)
1-2 teaspoons salt (depending on your taste)
1 teaspoon freshly ground black pepper
1 teaspoon dried summer savory (or oregano if you prefer that flavor)
a few drops of gluten free hot sauce
sugar, if needed
red currant jelly as needed
Frying oil:
1 Tablespoons butter or ghee
1-2 Tablespoons olive oil
a dried cayenne pepper
Sauce mixture:
Stir these three ingredients together in a glass measuring cup:
2 cups Chianti (red wine)
1/4 cup gluten free tomato paste (or more)
3 cups gluten free chicken broth or beef broth (home made)
More broth if needed
Make sure to use a red wine that is really drinkable - don't use a red wine that you think is too sour or the sauce will be sour.
Put all the meatball ingredients in a food processor and mix well, or chop everything finely and mix by hand. Most meatball recipes call for soaking bread crumbs in milk and then squeezing out the milk - that is not required. Just mix the gluten-free bread crumbs with the meat and onions etc. and then form the mixture in to large meatballs - larger than a whole walnut.
Heat the oil and butter or ghee with the cayenne pepper in a non-stick pan that can accomodate all the meatballs, and brown the meatballs in this oil. To the same pan that contains the meatballs, add the wine mixture and stir gently. Cook the meatballs in the wine sauce for about 15-20 minutes, stirring as necessary and adding more broth if the sauce becomes too thick. It is not necessary to cover the pan while cooking these meatballs. Taste the sauce for salt and pepper, and add more if you like. If the sauce requires a half teaspoon of sugar to improve the flavor, add the sugar at this point. You might also add, and this is a super addition, a couple of tablespoons of red currant jelly, whcih will melt into the sauce and give it something special. Remove the cayenne pepper before serving.
(If you have only a small frying pan, you will need to brown the meatballs in batches and then put them in a larger pan to make the sauce.)
The original recipe that this is based upon came from Bon Appetit magazine, February 2001. The original included flour, and required the meatballs to be baked and so on. This revision is gluten free.
Make sure all your ingredients are gluten free!
© Gf-Zing! | Alice DeLuca
Spicy Collard Greens with Lemon and Rice
Originally, the recipe was for a Turkish salad, but we found that with a few adjustments we had a fine, highly-flavored hot side dish. You can use this recipe with other "braising" greens, such as swiss chard.
3 Tablespoons olive oil
1/2 cup shallots, peeled and sliced
1 cup of diced tomatoes
1/2 cup diced green peppers
2 pounds of collard greens, cleaned well and chopped (leave out the tough parts of the stem)
2 cups gluten free chicken stock
1/2 cup uncooked Jasmine, long-grain or Basmati rice
salt
freshly ground pepper
Gluten free hot sauce or asian garlic hot pepper sauce, about 1/2 teaspoon or to taste
juice of 1 lemon
Fry the shallots in the oil in a non-stick pan with a lid. Add the tomatoes, peppers and collard greens (don't worry, the huge amount of collard greens will shrink as it cooks.) and fry for a few minutes while the collard greens cook down to fit into the pan. Add the chicken stock and rice, salt, pepper and hot sauce and cover the pan. Cook over low heat for about 20 minutes, stirring occasionally and adding more stock if necessary. Sprinkle with lemon juice.
Serve with a sauce made from 1 cup of plain yogurt mixed with 2 cloves of raw garlic, grated, and a dash of salt.
Make sure all of your ingredients are gluten free!
© Gf-Zing! | Alice DeLuca
Cranberry Sauce, with Orange
1 bag of fresh cranberries
1 cup white sugar
1 cup water
2 strips (1/2 inch x 3 inches) orange zest (just the orange part of the peel, without the white stuff)
Pick over the cranberries, wash them and put them in a saucepan together with the sugar, water and orange zest. Bring to a boil and simmer for 10 minutes, stirring from time to time.
Skim off any strange white foam, remove orange strips and transfer the cranberry sauce to a nice bowl. Refrigerate.
Emergency Cranberry Sauce: Should you find yourself in a big hurry, make the sauce as above, then put the hot sauce in a metal bowl, and place this bowl over ice water. Stir the cranberry sauce to cool it down, without allowing the melting ice and surrounding water to creep into the sauce. You are basically using the ice water bath to cool down the outside of the bowl that your sauce is sitting in, and stirring it to make sure all of the sauce gets cooled quickly. Using this method, you can go from a hot sauce to the table in under a quarter of an hour.
© Gf-Zing! | Alice DeLuca
New England Apple Pie
Use the Dream Pastry Recipe from Bette Hagman's More From the Gluten-Free Gourmet. We use one stick of gluten free margarine and one of butter. We use 1 Tablespoon lemon juice in place of the vinegar, for the flavor.
2-crust unbaked pie shell
8 apples - Use a mix of varieties like Northern Spy, a few Russet, Baldwin, Golden Delicious, a few Granny Smith and peel, core and slice them. Don't use MacIntosh or Macoun varieties unless you use maybe only one of each - they don't hold their shape when cooked and are better for making apple sauce.
1/2 cup dark brown sugar
1/2 cup white sugar
2 Tablespoons tapioca starch (available at health food or asian groceries)
1/2 teaspoon gluten free ground cinnamon
Line a glass pie dish with one piece of the pastry. Mix the apples with all the other ingredients until thoroughly mixed. Load up the pie shell with the apple mixture. Put the other crust on top, and cut several steam holes in the top crust.
Now, sprinkle the top crust with at least 2 Tablespoons of additional white sugar. Preheat the oven to 400 degrees. Place a cookie sheet as a drip tray in the oven to catch any overflowing juices.
Place the pie in the oven, above the drip tray. Bake for 50 minutes, and then check to see if the top is getting golden. The pie is done when the crust is becoming golden and the juices are starting to bubble up in a thickened sort of way. Some of the juices may be dripping over on the drip tray, and that is at is should be.
You can serve a slice of apple pie with cheddar cheese on the side, or melted on the top. That is always good. Also, you can serve pie for breakfast and it will be better for you than a sugary breakfast cereal - also, you will be happier.
© Gf-Zing! | Alice DeLuca
Honeydew Chutney
1 large honeydew melon, seeded, peeled and cut into 1 inch chunks.
1/4 cup pickling salt, plus an extra 1/2 teaspoon
2 cups gluten free cider vinegar
2 cups light brown sugar
1 teaspoon ground ginger
1/4 teaspoon crushed dried cayenne pepper
1/4 teaspoon whole allspice, crushed in a mortar and pestle
2 inches of cinnamon stick
1 cup chopped onion
1/2 cup EACH diced red and green bell pepper
1 clove garlic, minced or grated
1/2 cup dry currants
1/3 gluten free brandy
Soak the melon cubes in cold water to cover, with the 1/4 cup pickling salt, overnight in the regrigerator. The pickling salt is not iodized, so your pickle will not turn brown. Drain and rinse the melon in several changes of cold water.
Put the remaining ingredients (except for the currants and brandy,) in a large heavy pot and bring to a boil. Add the melon chunks and the currants and brandy, and simmer the chutney for nearly 2 hours, until it has reduced in volume by a half and thickened up. Do not cover while cooking. Store the chutney in the refrigerator. This chutney will keep for a long time.
Make sure all your ingredients are gluten free.
© Gf-Zing! | Alice DeLuca
November 1, 2005
Hutspot - A Dutch Potato Dish
2 parts potatoes
1 part onions
1 part carrots
water
salt
freshly ground pepper
butter
This is a very simple dish, and completely adjustable. If you use 2 pounds of potatoes, then use one pound of the carrots and onions. If you use more potatoes, increase the other vegetables accordingly. Peel the vegetables, cut the potatoes and carrots in chunks and cut up the onions a bit more.
Put all the vegetables into a pot with a lid. Add water about half way up the vegetables, then salt . Put the top on and cook on medium heat until the vegetables are soft. Drain the extra water (if necessary) - often there is no need to drain it, depending on what kind of potatoes you used. Mash while adding butter and freshly ground pepper. Taste the seasoning, and serve with meat dishes.
A simple dish that expands your potato horizons!
© Gf-Zing! | Alice DeLuca
Coconut Cream Pie - gluten free, with no cream!
9" pie gluten free shell - baked
Coconut Filling:
1 cup gluten free coconut milk (canned, reconstituted or frozen)
2 cups gluten free almond milk
1/2 cup sugar
1 Tablespoon butter or margarine
pinch of salt
1/4 cup fresh grated or sweetened dried coconut
5 Tablespoons cornstarch and enough water to make a thin mixture
4 egg yolks
1/2 teaspoon gluten free vanilla
Meringue Topping:
4 egg whites
1/8 teaspoon cream of tartar
1/4 teaspoon salt
1/4 cup sugar
1/2 teaspoon gluten free vanilla
To make the filling:
Mix the coconut and almond milks, sugar, butter, salt and coconut in the top of a double-boiler over hot water. Stir constantly until the mixture is very hot. Mix the cornstarch with enough water just to thin it to pouring consistency, then add this to the hot mixture, stirring constantly and continue to stir until thickened.
Beat the egg yolks in a bowl just until mixed. Stir a little of the hot mixture into the egg yolks, beating constantly so as not to cook the egg yolks. Add the rest of the hot mixture and the vanilla, again stirring constantly. Put the mixture back over the hot water (double boiler) and cook for 2 more minutes and don't forget to keep stirring! Cool this coconut custard, and then pour it into the prepared pie shell. Set it aside while you make the meringue.
To make the meringue:
Beat the egg whites, cream of tartar and salt tuntil they form soft peaks. Beat in the sugar and beat until the meringue makes smooth peaks. Add vanilla and spread the meringue on the filling in the pie shell.
Bake the pie at 400 degrees for 10 minutes, until the meringue is nicely browned. Chill the pie completely before serving.
Make sure all your ingredients are gluten free!
© Gf-Zing! | Alice DeLuca
Subscribe to:
Posts (Atom)