Since we can't have gluten, why not have some vanilla ice cream with our breakfast instead? This cake is good, with or without added vanilla ice cream. It is pretty darned sweet - not so sweet that it makes your teeth hurt, but almost.
Mix in a food processor, and then transfer to a large bowl:
2 cups gluten free cookie flour
1/2 cup (1 stick) unsalted butter
2 cups dark brown sugar
1 cup finely chopped toasted pecans (toast them in a 300 degree oven for 10-15 minutes, cool, then chop)
1/4 teaspoon xantham gum
Remove 2 3/4 cups of this mixture and pat it evenly into an ungreased 9x13 inch baking pan. Set aside.
To the remaining dry ingredients, add the following and combine thoroughly:
2 teaspoons gluten free cinnamon
1 teaspoon baking soda
1/2 teaspoon salt
1 cup gluten free sour cream
1 teaspoon gluten free vanilla
1 egg
Lastly, to this mixture add:
2 cups finely chopped apples (peel first)
Carefully plop spoonfulls of this mixture over the stuff that is in the 9x13 pan that you set aside earlier. Spread the gooey dough carefully over the dry layer.
Bake for 30-35 minutes at 350 degrees until a toothpick comes out clean. Cool in the pan, then cut in large squares and serve it slightly warm with gluten free vanilla ice cream. At the time of this writing, Haagen-Dazs claims gluten free status for its vanilla ice cream, but the consumer must check frequently to see if the company has changed their formulations.
Note: The bottom "crust" improves the structural integrity of this cake, and produces an interesting textural contrast.
Always use all gluten free ingredients!
© Gf-Zing! | Alice DeLuca
Gf-Zing! Celebrating flavor in the gluten-free world...
December 31, 2005
December 28, 2005
Ginger Bisuits or Cookies
All those gluten-free cookies need to have the spice and flavor component enhanced, as spices and flavors tend to disappear into the rice flour.....Here is a good way to obtain a nice, strongly ginger-flavored cookie - a recipe from Gf-Zing!
You will need Miss Roben's Mock Graham Cracker Cookie mix for this recipe.
Put the contents of 1 package of Miss Roben's Mock Graham Cracker mix in a large bowl.
Add:
2 teaspoons gluten free ground ginger
1 teaspoon freshly grated lemon zest
3/4 cup minced crystallized ginger
Now, follow the instructions on the Miss Roben's Graham Cracker mix bag, adding the honey, vanilla, butter, and water. Do not leave out the honey - use a fresh, local honey for extra good flavor.
Roll out the dough between pieces of waxed paper dusted with confectioner's sugar, until the dough is about 1/4 inch thick. Cut with cookie cutters or a small glass. You can prick the cookies with a fork or press them with a ceramic cookie stamp - both methods will make nice designs on these cookies.
Bake the cookies as per the instructions on the Miss Roben's bag. If you cook them longer they get darker and crunchier. They will keep for a long time in a cookie jar, and are excellent with coffee or tea.
Your friends in the glutenated world will want this recipe!
Make sure that you use all gluten-free ingredients!
© Gf-Zing! | Alice DeLuca
December 15, 2005
Quick Gluten Free Enchilada Sauce
The original recipe included wheat flour, but this recipe is gluten free. This Gf-Zing! recipe produces 2 cups of finished enchilada sauce.
1/2 cup minced onion
1 clove garlic, minced
2 Tablespoons olive oil
1/4 cup gluten free chili powder
1/2 teaspoon dried oregano
1/4 teaspoon ground cumin
1 teaspoon salt
1 cup tomato puree
1 cup water or stock
Fry the onion and garlic gently in oil until they are wilted. Add the seasonings and stir. Add the tomato and stock and simmer 10 minutes.
Be sure to use all gluten free ingredients, including the spices, canned tomato product and stock. As of December 15, 2005, the McCormick brand states on their website: "When a product that contains gluten is formulated, we take precautions to ensure the source of gluten is declared on our label in the ingredient statement." This makes the McCormick brand of spices very attractive to the gluten-free community. The DelMonte website makes similar statements about their tomato products. "The list below includes products that, to the best of our knowledge, do not contain wheat, oats, rye or barley/malt ingredients. The list may change or not be complete due to formula changes or new product introductions. Please read the ingredient statement on the label for the most current information."
Note: it is important to check with the manufacturer and read labels to see if policies or ingredients have changed.
© Gf-Zing! | Alice DeLuca
December 12, 2005
Sugar Cookies - Gluten Free
Here at Gf-Zing!, we decided that sugar cookies are a little bit like pie crust without the pie, so why not use a gluten free pastry flour to make the cookies?
Gluten free baking can produce a pretty bland product. This sugar cookie dough has extra -strong vanilla flavor, due to the addition of Authentic Foods Vanilla Powder. Authentic Foods is located in Gardena, California.
2 1/2 cups gluten free dream pastry flour (see below)
3/4 teaspoon salt
1 1/2 sticks butter
3/4 cup sugar
1 large egg
1 teaspoon liquid GF vanilla extract
1/2 teaspoon powdered GF vanilla (Authentic Foods makes such a product)
confectioner's sugar for rolling
Cream the butter and sugar with the liquid vanilla extract. Mix the gluten free flour, salt and powdered gluten free vanilla in a separate bowl. Add the egg to the butter mixture. Mix thoroughly. Then add the dry ingredients. Form in to a ball and refrigerate for one hour at least. You can use a food processor for mixing this dough.
Roll out the dough to 1/4" thickness between two sheets of wax paper. If you need to "flour" the wax paper to keep the dough from sticking, use liberal amounts of confectioner's sugar. Cut out the cookies, using a cookie cutter and transfer them to a silpat lined cookie sheet.
Bake in a preheated oven 350 degrees for 10-12 minutes or more, until they are as brown as you like them.
"Dream pastry flour" is from Bette Hagman's cookbooks, and the recipe is also available on the internet. It is meant for use in pie crusts:
2 cups tapioca starch
2 cups cornstarch
1 cup potato starch (not potato flour)
4 cups mochiko (sweet rice flour)
4 teaspoons xantham gum
2 teaspoons sugar
2 teaspoons salt
Mix these ingredients really thoroughly, either in a large bowl, bag or jar, and store in an airtight container.
Gf-Zing! recommends using all gluten free ingredients.
© Gf-Zing! | Alice DeLuca
December 10, 2005
Apple Pecan Breakfast Cake
This recipe for a very moist breakfast cake comes from the specific carbohydrate diet. It has been adjusted by Gf-Zing! to include some gluten free flour. It contains no white sugar, using only honey as a sweetener.
In a large bowl, mix up and set aside:
2 cups finely ground pecans
1 cup gluten free cookie flour mix
3 cups coarsely grated baking apples
In a food processor, mix well:
2/3 cup honey
1/3 cup butter
1/2 teaspoon salt
4 large eggs
2 teaspoons cinnamon
1/2 teaspoon ground cloves
1 teaspoon freshly grated nutmeg
1 teaspoon baking soda
Grease a heavy bundt pan extremely well. Mix the contents of the food processor with the apples, ground pecans and gluten free flour. Pour the batter into the prepared bundt pan. Bake for one hour at 350 degrees, until cake tester or toothpick comes out clean. The edges of the cake will be pulled away from the sides of the pan some, and the top will be brown.
Let cool for 10 minutes, then loosen the edges of the cake from the pan if necessary and turn the cake out on a rack to cool.
Use all gluten-free ingredients!
© Gf-Zing! | Alice DeLuca
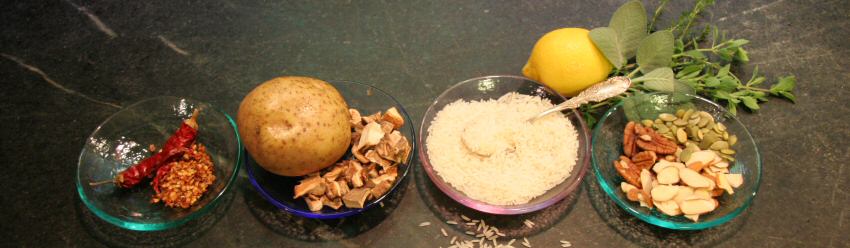
Lemon Rice Pudding
In a large bowl, mix the following ingredients:
2 eggs
1/3 cup brown sugar
1/4 teaspoon finely grated fresh lemon zest
2 Tablespoons fresh lemon juice
1/4 teaspoon gluten free vanilla
Cook one cup of dry, long-grain rice with 1/2 teaspoon of salt, until done. You can use a rice cooker, or do it on top of the stove. While the cooked rice is still very hot, stir it quickly and vigorously into the bowl with the eggs and seasonings. Stir quickly so the eggs don't cook before the mixture is all mixed up. The hot rice will cook the eggs.
Transfer to a serving dish; sprinkle the top with gluten free cinnamon.
Cool the pudding to room temperature or colder before serving.
Make sure all your ingredients are gluten free.
The original version of this recipe is from Still Life With Menu, by Molly Katzen, published in 1988.
© Gf-Zing! | Alice DeLuca
Baked Fish
This recipe has been adjusted by Gf-Zing! to make it accessible to the gluten free world.
Place the following ingredients in an oven-proof casserole with a lid:
2 Tablespoons white wine
2 Tablespoons butter (or gluten free margarine, or olive oil)
2 Tablespoons capers
1 Tablespoon chopped fresh parsley (use your kitchen shears to snip the parsley)
1 teaspoon snipped fresh chives
2 teaspoons fresh lemon juice
Give this mixture a little stir, then add
2 pounds of cod, haddock or other white fish
Sprinkle the fish with salt, freshly ground pepper, and gluten free paprika. Pour another 2 Tablespoons of butter or olive oil over the fish.
Cover the casserole and bake at 350 for 20-25 minutes, depending on the thickness of the pieces of fish.
Be sure to use all gluten-free ingredients, even the spices.
© Gf-Zing! | Alice DeLuca
Sushi, Musubi
Mix up a batch of gluten free sushi rice, and you are ready to make a Hawai'ian specialty called "musubi." In Hawai'i Musubi is often topped with Spam, but no matter, it is a great method of making a sandwich-like concoction that is perfectly sized for lunch. This recipe is presented here by Gf-Zing!, celebrating flavor and excitement in the gluten free world.
You will need a plastic musubi mold or a Spam can to make this recipe. You are going to make a sort of brick of seasoned rice wrapped in seaweed, with fillings in the middle. Spam musubi would have the Spam on the top, rather than in the middle, but that is no matter.
You can cook sushi rice on top of the stove or in your rice cooker. Use about 2 to 1 ratio of water to dry, medium grain Japanese or sushi rice (Kokuho Rose or Nishiki are two common brands.)
Rinse 2 units of rice well. Cook it in 4 units of water, or use the sushi rice line on your rice cooker insert to measure the water. Turn on the cooker and wait until it is done.
When it is just finished cooking, place the rice in a large bowl. Have ready some gluten free seasoned rice vinegar, a rice paddle, and a piece of paper or a small hand-held fan.
While fanning the rice with one hand, stir the rice (using the rice paddle) with the other hand. Sprinkle a bit of seasoned rice vinegar on the rice and continue stirring and fanning. Continue to do this, adding more seasoned rice vinegar, until the rice has a pleasant sweet-sour-salty taste and has gotten cool. The rice is ready. For two cups of dry rice (5-6 cups cooked), you would use about 7 tablespoons or so of the vinegar.
Cut a piece of sushi nori (that is a dark sheet of edible seaweed that looks like shiny green-black paper) to fit the bottom and up the sides of the musubi mold. It should extend out the top of the mold on both long edges by an inch and a half. Typically, this requires half a sheet of sushi nori. Keeping the edges of sushi nori going up the sides of the mold, put some of the prepared rice in the bottom, on top of the nori. On top of this, you can add small amounts of any of the following fillings, as you like:
Cooked fish or shellfish
avocado slices coated in lemon juice (so they don't get brown)
slivered cooked carrots
gluten free smoked fish
cucumber slivers
Japanese seasoning peppers (gluten free)
gluten free ham, sliced very thin
Fill the rest of the mold up to the top with seasoned rice. Press down on the rice with your rice paddle firmly. Fold the ends of the nori down over the top, then use the presser that comes with the mold to tightly compress the entire thing by pressing down on the top of the folded nori. You will have a dense brick of rice and pretty colored foods all contained in a portable form. Wrap this brick in tin foil (aluminum foil) and you have a nice complete lunch. Depending on the ingredients you used for filling, you may not need to refrigerate this musubi, making it very convenient for camping or work places without refrigeration.
Important Notes: Unfortunately, currently the gluten free community must avoid wasabi paste, which often contains wheat. Soy sauce also often contains wheat, so read labels before trying to dip your musubi in soy sauce. Be careful also to make sure that the seasoned rice vinegar is gluten free. Some are not. Also, imitation seafood products are often made with wheat and should be avoided.
A picture of spam musubi (with the spam on top) is available at the following page:
Wikipedia article
Always use gluten free ingredients.
© Gf-Zing! | Alice DeLuca
December 9, 2005
Venetian Christmas Cookie/Neapolitan Three-Colored Cakes
One of the greatest gluten-free interests we had was recreating this Christmas cookie. We first encountered it in Better Homes and Gardens magazine in the 1970s. Back then, the recipe called for 10 drops of green food coloring and 8 drops of red (for the different colored layers). Now, in the December issue of Gourmet (2005), the same recipe has appeared under the name of Seven-Layer Cookies, but with 25 drops of each color of food coloring and with chocolate icing on both the top and the bottom. This larger amount of food coloring produces a much more garish cookie. With the bright colors and chocolate icing on top and bottom, it seems like the three-car garage of cookiedom. We prefer the original, smaller amounts of food coloring, and chocolate only on the top. Gf-Zing! presents the recipe here, adapted for gluten free cooking with gf flour and extra almond extract to make up for the flavorless rice flour, and including a link to how to make your own almond paste.
8 ounces gluten free almond paste
3 sticks butter
1 cup sugar
4 eggs, separated
1 1/2 teaspoons almond extract
2 cups gluten free cookie flour mix
1/4 teaspoon salt
10 drops green food coloring
8 drops red food coloring
12 ounces apricot preserves
4 ounces gluten free semisweet chocolate
You need 3 pans, each 9x13" to make these cookies, or use the same one over and over.
Grease the three pans, line them with wax paper, and grease the wax paper.
In your food processor, mix the almond paste, egg yolks, butter, almond extract and salt. Beat for 5 minutes, until the mixture is really smooth. Add the gluten free cookie flour and mix well.
In a separate bowl, beat the egg whites until they form stiff peaks. Fold the dough from the food processor into the egg whites.
Remove 1 1/2 cups of the batter and spread it all over the bottom of one of the three prepared pans. Remove another 1 1/2 cups of batter to a separate bowl, add the green food coloring and spread the green batter in a second pan. To the last remaining batter, add the red coloring. Spread this red batter in the third pan. The batter spread in the pans will be very thin - only a quarter of an inch or so.
Bake in a preheated oven 350 degrees for fifteen minutes. The dough will start to pull away from the edges, and start to brown around the edges. The top will be springy to the touch. Remove the pans from the oven and set aside.
Melt the 12 ounces of jam in a pan. Some of the recipes for this cookie call for straining the jam, but this is not necessary. Enjoy the lumps! Turn out the green cake on a flat cookie sheet that is lined with tin foil or some other durable material. Spread half the jam on the green cake. Top with the plain colored cake. Spread the remaining jam on the plain colored cake. Top with the red cake. Put a piece of plastic wrap on the top of the red layer. Put a cookie sheet on top. Place canned goods, or heavy weights, around the cookie sheet to weigh down the cake and glue the layers together. If you have a heavy wooden cutting board, you can use that instead. Set aside in a cool place for several hours or overnight.
Melt the chocolate. If you like bitter chocolate, add an ounce of bitter chocolate to the semisweet chocolate. Remove the cans, cookie sheet and plastic wrap from the top of the cake, and then spread the red cake layer with melted chocolate. Allow to harden (this will take some time - at least 30 minutes). Slice off the edges of the cake and put these scraps on a plate for sampling. Slice the cake into squares, about 1" on a side, using a sharp knife and a ruler (to mark where to cut). You may have to run hot water over the knife, then dry it with a clean towel, from time to time so that crumbs don't get onto the chocolate topping.
These can be stored in an airtight container in the freezer, with wax paper between the layers of cookies, and removed as needed. If cut into 1" squares, over 100 cookies are produced.
Make sure to use all gluten free ingredients.
© Gf-Zing! | Alice DeLuca
Almond Paste - homemade and gluten free!
Commercial almond paste is often made with glucose derived from wheat, and is therefore out-of-bounds for the gluten free community. Here is how to make your own gluten free almond paste for baking cakes and cookies. Almond paste made at home does not have as intense an almond flavor as the commercial product because it does not contain bitter almond. This recipe has been developed and tested for the gluten free community by Gf-Zing!
1 pound shelled, blanched, peeled almonds (simply put, the almonds look whitish in color, with no brown skin on them - it doesn't matter if they are whole or slivered)
3 1/2 cups gluten free confectioner's sugar
2-3 egg whites
Grind the nuts in a food processor with a sharp blade until they are almost turning to the consistency of peanut butter. Add the sugar and 2 egg whites. Process until the mixture forms a uniform ball. Add the third egg white only if you have to. You will probably need to separate the mixture into two batches to process the paste. If that is the case, mix the almonds and sugar, divide it in half, then add one egg white to each half. That is the best way.
This almond paste will work for baked goods. Do not eat it raw, as it contains raw eggs.
It will keep for less than a week in the refrigerator, so use it quickly. To use it in recipes, weigh out amounts with a kitchen scale.
Make sure all your ingredients are gluten free.
© Gf-Zing! | Alice DeLuca
Venetian Christmas Cookie/Neapolitan Three-Colored Cakes
One of the greatest gluten-free interests we had was recreating this Christmas cookie. We first encountered it in Better Homes and Gardens magazine in the 1970s. Back then, the recipe called for 10 drops of green food coloring and 8 drops of red (for the different colored layers). Now, in the December issue of Gourmet (2005), the same recipe has appeared under the name of Seven-Layer Cookies, but with 25 drops of each color of food coloring and with chocolate icing on both the top and the bottom. This larger amount of food coloring produces a much more garish cookie. With the bright colors and chocolate icing on top and bottom, it seems like the three-car garage of cookiedom. We prefer the original, smaller amounts of food coloring, and chocolate only on the top. Gf-Zing! presents the recipe here, adapted for gluten free cooking with gf flour and extra almond extract to make up for the flavorless rice flour, and including a link to how to make your own almond paste.
8 ounces gluten free almond paste
3 sticks butter
1 cup sugar
4 eggs, separated
1 1/2 teaspoons almond extract
2 cups gluten free cookie flour mix
1/4 teaspoon salt
10 drops green food coloring
8 drops red food coloring
12 ounces apricot preserves
4 ounces gluten free semisweet chocolate
You need 3 pans, each 9x13" to make these cookies, or use the same one over and over.
Grease the three pans, line them with wax paper, and grease the wax paper.
In your food processor, mix the almond paste, egg yolks, butter, almond extract and salt. Beat for 5 minutes, until the mixture is really smooth. Add the gluten free cookie flour and mix well.
In a separate bowl, beat the egg whites until they form stiff peaks. Fold the dough from the food processor into the egg whites.
Remove 1 1/2 cups of the batter and spread it all over the bottom of one of the three prepared pans. Remove another 1 1/2 cups of batter to a separate bowl, add the green food coloring and spread the green batter in a second pan. To the last remaining batter, add the red coloring. Spread this red batter in the third pan. The batter spread in the pans will be very thin - only a quarter of an inch or so.
Bake in a preheated oven 350 degrees for fifteen minutes. The dough will start to pull away from the edges, and start to brown around the edges. The top will be springy to the touch. Remove the pans from the oven and set aside.
Melt the 12 ounces of jam in a pan. Some of the recipes for this cookie call for straining the jam, but this is not necessary. Enjoy the lumps! Turn out the green cake on a flat cookie sheet that is lined with tin foil or some other durable material. Spread half the jam on the green cake. Top with the plain colored cake. Spread the remaining jam on the plain colored cake. Top with the red cake. Put a piece of plastic wrap on the top of the red layer. Put a cookie sheet on top. Place canned goods, or heavy weights, around the cookie sheet to weigh down the cake and glue the layers together. If you have a heavy wooden cutting board, you can use that instead. Set aside in a cool place for several hours or overnight.
Melt the chocolate. If you like bitter chocolate, add an ounce of bitter chocolate to the semisweet chocolate. Remove the cans, cookie sheet and plastic wrap from the top of the cake, and then spread the red cake layer with melted chocolate. Allow to harden (this will take some time - at least 30 minutes). Slice off the edges of the cake and put these scraps on a plate for sampling. Slice the cake into squares, about 1" on a side, using a sharp knife and a ruler (to mark where to cut). You may have to run hot water over the knife, then dry it with a clean towel, from time to time so that crumbs don't get onto the chocolate topping.
These can be stored in an airtight container in the freezer, with wax paper between the layers of cookies, and removed as needed. If cut into 1" squares, over 100 cookies are produced.
Make sure to use all gluten free ingredients.
© Gf-Zing! | Alice DeLuca
8 ounces gluten free almond paste
3 sticks butter
1 cup sugar
4 eggs, separated
1 1/2 teaspoons almond extract
2 cups gluten free cookie flour mix
1/4 teaspoon salt
10 drops green food coloring
8 drops red food coloring
12 ounces apricot preserves
4 ounces gluten free semisweet chocolate
You need 3 pans, each 9x13" to make these cookies, or use the same one over and over.
Grease the three pans, line them with wax paper, and grease the wax paper.
In your food processor, mix the almond paste, egg yolks, butter, almond extract and salt. Beat for 5 minutes, until the mixture is really smooth. Add the gluten free cookie flour and mix well.
In a separate bowl, beat the egg whites until they form stiff peaks. Fold the dough from the food processor into the egg whites.
Remove 1 1/2 cups of the batter and spread it all over the bottom of one of the three prepared pans. Remove another 1 1/2 cups of batter to a separate bowl, add the green food coloring and spread the green batter in a second pan. To the last remaining batter, add the red coloring. Spread this red batter in the third pan. The batter spread in the pans will be very thin - only a quarter of an inch or so.
Bake in a preheated oven 350 degrees for fifteen minutes. The dough will start to pull away from the edges, and start to brown around the edges. The top will be springy to the touch. Remove the pans from the oven and set aside.
Melt the 12 ounces of jam in a pan. Some of the recipes for this cookie call for straining the jam, but this is not necessary. Enjoy the lumps! Turn out the green cake on a flat cookie sheet that is lined with tin foil or some other durable material. Spread half the jam on the green cake. Top with the plain colored cake. Spread the remaining jam on the plain colored cake. Top with the red cake. Put a piece of plastic wrap on the top of the red layer. Put a cookie sheet on top. Place canned goods, or heavy weights, around the cookie sheet to weigh down the cake and glue the layers together. If you have a heavy wooden cutting board, you can use that instead. Set aside in a cool place for several hours or overnight.
Melt the chocolate. If you like bitter chocolate, add an ounce of bitter chocolate to the semisweet chocolate. Remove the cans, cookie sheet and plastic wrap from the top of the cake, and then spread the red cake layer with melted chocolate. Allow to harden (this will take some time - at least 30 minutes). Slice off the edges of the cake and put these scraps on a plate for sampling. Slice the cake into squares, about 1" on a side, using a sharp knife and a ruler (to mark where to cut). You may have to run hot water over the knife, then dry it with a clean towel, from time to time so that crumbs don't get onto the chocolate topping.
These can be stored in an airtight container in the freezer, with wax paper between the layers of cookies, and removed as needed. If cut into 1" squares, over 100 cookies are produced.
Make sure to use all gluten free ingredients.
© Gf-Zing! | Alice DeLuca
December 8, 2005
Yeast-raised Buckwheat Pancakes
This recipe has been developed and tested for the gluten free community by Gf-Zing!
Mix in a large bowl:
1 cup gluten free cookie flour
1 cup buckwheat flour (this is not wheat)
1 package (about a tablespoon) gluten free fast-rising yeast
2 Tablespoons gluten free buttermilk powder
1 Tablespoon sugar
1/2 teaspoon salt
Stir this up, then add 2 cups lukewarm water. Mix well and set on a radiator or other warm place for 1 hour.
After an hour of rising, add
2 eggs
3 Tablespoons oil
1/2 teaspoon gluten free baking powder
Mix well. Then let the complete mixture rise for another 15 minutes or more.
Adjust the thickness of the batter to your liking by adding additional water for thinner pancakes. Heat a heavy skillet nice and hot. Add some butter. Spoon in some batter in the size you like. When each pancake has bubbles on the top that have popped, and the top of the pancake looks kind of dry, flip the pancake. Cook on the other side. The pancakes will be a dark color because of the buckwheat flour. Serve hot with butter and grade B pure Maple Syrup.
Store the leftover batter in the fridge over night - the pancakes you make the second day will be even better than the first day's pancakes.
Make sure all of your ingredients are gluten free!
© Gf-Zing! | Alice DeLuca
December 4, 2005
Nilufer's Khitchri
This recipe is shared by Nilufer C. She says:
The traditional Indian khitchri is a combination of rice and moong daal cooked together. The following version is a Parsi style khitchri (yellow rice) made without the daal and eaten at least once a week with different curries, sauces and accompaniments.
Ingredients :
1 small onion
1 tablespoon cooking oil
1/2 teaspoon cumin seeds
3-4 peppercorns
3-4 cloves
2 whole cardamoms
1 stick cinnamon
1 cup rice
2 cups water
salt to taste
1 teaspoon turmeric
Sauté onion in a 4 quart pot till golden brown. Add cumin seeds, pepper corns, cloves, cardamom seeds and cinnamon. Sauté for about 1 minute.
Add rice, water, salt and turmeric. Stir and bring to a boil. Remove from stove and place covered in preheated 300 degree oven for about 20 minutes.
If desired remove pepper, cloves, cardamom, and cinnamon stick from ice before serving. (Serves 4)
Gf-Zing! notes: If you don't have turmeric, you can try using a couple of gluten free bouillion cubes in place of the salt. The dish cooks nicely in a Corningware casserole with a glass lid. When you lift off the lid, the delicious aroma of the rice will bring everyone to the kitchen asking what is for dinner! Also, this dish can take longer than 20 minutes to cook, depending on the type of rice you use (basmati for example,) and the temperature of the water.
We have served this rice with a French-style pot-roasted chicken, a braised cabbage in a German style, and an Italian Chianti - the mulit-culti combination was outstanding.
© Gf-Zing! | Alice DeLuca
Cornmeal Almond Cake with Orange Syrup
The original recipe that this comes from was written in metric weights. It is interesting that 190 grams of corn meal is 1 cup, and the same weight of almond meal is 2 cups (loosely packed). There is not an error in the measurements - this is just how it worked out! This recipe has been modified and tested for the gluten free community by Gf-Zing!
1 1/3 cups sugar
4 large eggs
1/2 teaspoon salt
grated zest and juice from a navel orange
1 cup extra light olive oil
1 cup corn meal (or 190 grams)
2 cups almond meal (or 190 grams)
1 1/2 teaspoons gluten free baking powder
Beat the eggs with the sugar and salt, using an electric mixer, for 3 minutes, until light in color and fluffy. Beat in the zest and orange juice, and then the extra light olive oil. This creates a sort of mayonnaise-like substance, with the eggs acting as an emulsifier.
Mix the corn meal, almond meal and baking powder together and fold into the egg mixture. The batter will look like corn meal mush.
Grease a 9-inch spring-form pan, line it (bottom and sides) with wax paper, then grease the wax paper. Pour the batter in to the lined pan and bake at 350 for 1 hour and five minutes. The cake will be dark brown on the top. Remove it from the oven.
Syrup:
Make a syrup of 1/2 cup sugar, 1/2 cup water, 6 tablespoons fresh orange juice (1 orange). Simmer this syrup for 8 minutes. Skim off any foam. Add 2 Tablespoons of gluten free orange liqueur, if desired. Poke holes all over the top of the cake with a skewer, then pour the hot syrup over the cake, while the cake is still in the pan. The cake will soak up the syrup almost immediately.
As soon as possible after pouring the syrup on the cake, remove the sides of the cake pan and transfer the cake to a plate. Use the wax paper to help you in moving the cake, and make sure to remove the metal bottom of the pan too. If you leave the syrupy cake in contact with the pan for much time at all, the acidic syrup will interact with the metal pan and cause the cake to have a metallic flavor.
Chill the cake completely before serving. When completely finished, the cake will be about 1 1/2 inches tall and will serve 12.
Use all gluten-free ingredients!
© Gf-Zing! | Alice DeLuca
French Chicken, with Butter and Sour Cream
This is a simple but perfect way to cook a chicken on top of the stove in an hour or two. The recipe has been modified and tested for the gluten free community by Gf-Zing!
1/3 stick of butter
A 3-7 pound gluten free roasting or frying chicken, cleaned
salt
pepper
Sour cream
Melt the butter in a heavy pot that has a lid and will hold the chicken. Heat the butter until it browns slightly. Add the chicken, and turn it around in the butter until it is coated on all sides. If the chicken has a pop-up timer, make sure it is facing up! Season with salt and pepper. Put the lid on, and cook over a low, low heat for 1-2 hours. Try not to keep opening the lid, but if you must, you must. When the chicken is cooked through, there will be considerable liquid in the bottom of the pan.
Remove the chicken, reduce the liquid to a cup or two. Add 1/3 cup of gluten free sour cream, more or less, a few tablespoons of additional butter, and salt and pepper to taste. Remove the skin from the chicken and discard the skin; slice the meat and add the meat to this sauce. Serve immediately. This is good with potatoes, plain rice or Nilufer's Khitchri rice dish.
You can use cornish game hens instead of chicken, if you prefer - they will take about 45-60 minutes to cook.
Make sure all your ingredients are gluten-free - including, believe it or not, the chicken itself. The poultry industry sometimes adds "solutions" to poultry, some of which contain gluten. It's a weird, weird, world!
© Gf-Zing! | Alice DeLuca
December 2, 2005
Eggplant Caviar
When this recipe first came to our attention, in the 1970s, the instructions called for cooking the mixture for two hours in a covered pan over very low heat. Over the course of time, the hybridization of eggplants and the introduction of hotter stove burners have necessitated some changes. The recipe is presented here in its original form, with recommendations for modern cooking methods. The recipe has been tested for the gluten free community by Gf-Zing!
1 medium eggplant, peeled and chopped in 1/4" cubes
1/4 cup olive oil
1 large onion, finely chopped
2 cloves garlic, minced
1 can gluten free stewed tomatoes (14 ounce size)
2 Tablespoons gluten free tomato paste (optional)
1 Tablespoon sugar
1/2 teaspoon salt
freshly ground black pepper
the juice of a half or a whole lemon
Fry the eggplant in the olive oil in a heavy-bottomed non-stick frying pan (12") until soft, about ten minutes. Mash with a potato masher, then add the rest of the ingredients except for the lemon juice. Do not add the lemon juice yet.
Add the rest of the ingredients and cover the pan. Reduce the heat to the lowest possible setting and cook for 2 hours, watching carefully so it doesn't burn. A heavy pan is necessary. When it is just starting to stick to the bottom of the pan, it is done cooking. Add the juice of 1/2-1 lemon, to taste. It should be somewhat tart.
This mixture is typically spread on "black bread" or Westphalian pumpernickel. For the gluten free community, try to find "Genuine Bavarian Gluten-Free Toast Bread" which is distributed by R & R Export-Import Specialties, PO Box 7667, Nashua NH 03060. (800)-818-7729.
Notes for modern cooks: If you have a stove that has hot burners, you can stir-fry the mixture for about 20 minutes, stirring constantly, until it starts to stick to the pan. The flavor will not be quite as intense as the old-fashioned low-heat method achieves, but it will be perfectly acceptable. If the eggplant seems to become soft and mushy quickly during the initial frying, this should be a clue that you need to cook the mixture for less time than two hours. Thirty years ago, the eggplant cubes could stand up to quite a bit of cooking and maintain their structural integrity but somehow the modern hybrids seem to disintegrate quickly.
© Gf-Zing! | Alice DeLuca
Creamy Lentil Soup with Curry and Chipotles
This mulligatawny style soup is gluten free, dairy free and vegan. The recipe has been developed and tested for the gluten free community by Gf-Zing!
1 Tablespoon vegetable oil
2 onions, chopped
2 cloves garlic, minced
2 teaspoons grated fresh ginger
1 teaspoon gluten free homemade chipotle chiles in adobo sauce
1 Tablespoon gluten free curry powder
1 teaspoon gluten free turmeric powder
2 stalks of celery, diced
1 or 2 carrots, sliced
2 potatoes, cubed
1/4 cup gluten free ketchup
1 quart water
1 can coconut milk
1 cup dry brown lentils
1 teaspoon salt, or more, to taste
Briefly fry the onions, garlic and ginger in the oil until soft. Add the curry powder and the turmeric and stir to coat the onions. Add the rest of the ingredients except the salt, and simmer uncovered for a half hour. Taste the soup. Add the salt, cook over low heat for 15 minutes more, and serve.
Make sure that all your ingredients are gluten free!
© Gf-Zing! | Alice DeLuca
Subscribe to:
Posts (Atom)